Branch Navigator
The branch navigator shows a list of your apps with their corresponding versions and the modules linked to them and their associated branches.
To access the Branch Navigator, click Global > Branch Navigator. Navigate the page by selecting an item in each column. This article explains the actions available as you select an item from each column, starting with Apps. Find each column and available actions explained in the sections below.
Notice
Some actions may not be available for you depending on your role and permissions granted. In such case, buttons are disabled. Read Roles and Permissions to learn more.
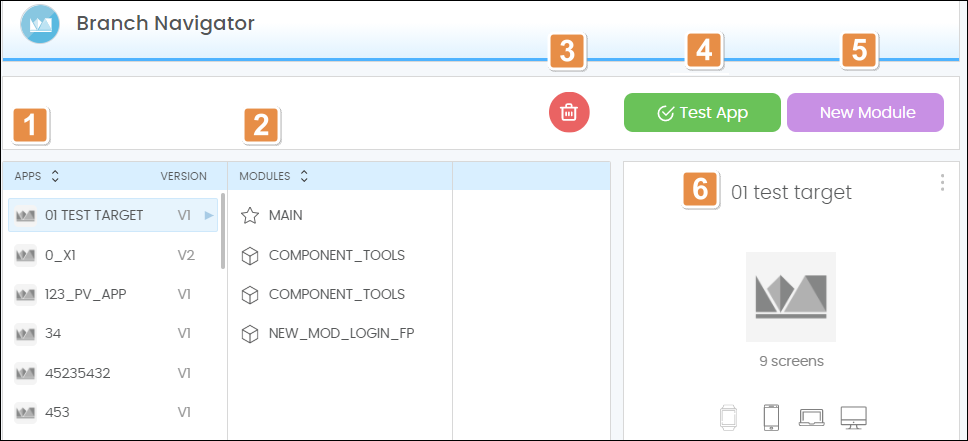
Apps. List of apps sorted alphabetically by name. Click the arrows to change the sorting direction. Click any app to see its modules in the Modules column.
Modules. Modules of the selected app. Click any module to open the next column and see its branches. The Main module is automatically created and represents your app. Any linked modules appear below. If your app has no linked modules, the Branch Navigator offers the option to create a new module by clicking New Module.
Delete. Click to delete the selected app.
Test App. Click to test the selected app.
New Module. Click to create a new module for the selected app.
Preview pane. Shows information of your app such as the number of screens and devices for which the app is available.
The Modules column contains the Main module and all the modules linked to your app. The Main module is automatically created, as it represents the app itself. You can link any other modules available in Studio in Global > Modules. To learn more about modules, read Modules.
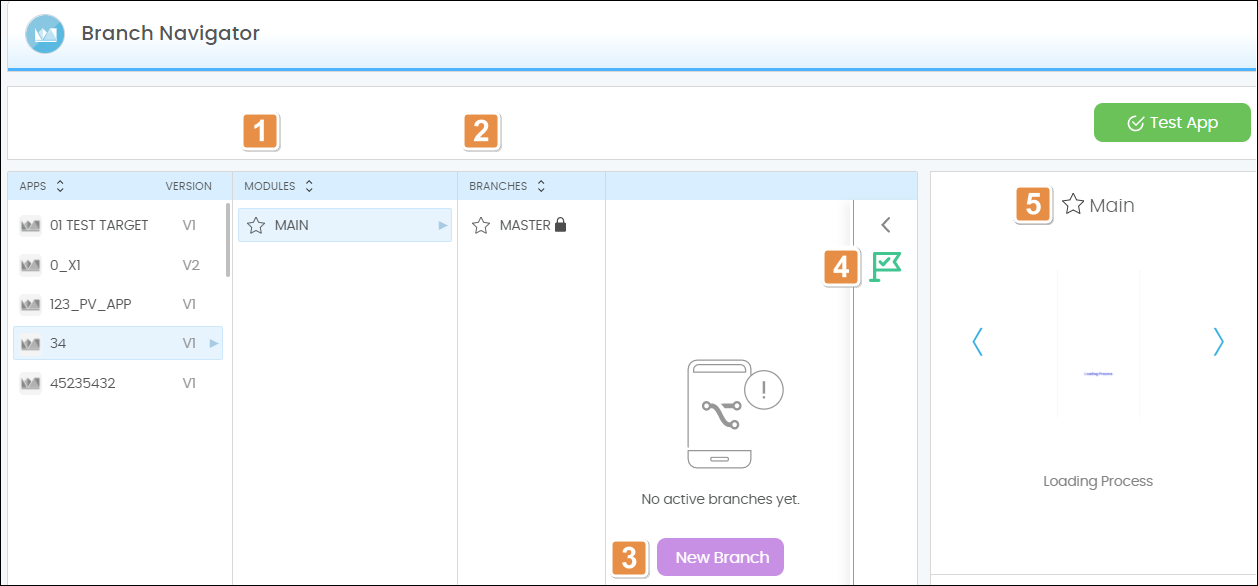
Modules. Any linked modules appear below the main module.
Branches. List of branches created for the main module. Master is created automatically as a read-only branch, and any branches you create appear below.
New Branch. Click to create a new branch for the main module. This button will only be available if no branches already exist.
Timeline tab. Click the arrow to see the history of changes made to the selected module. Read View Timeline to learn more.
Preview pane. Shows a preview of the screens in the selected module.
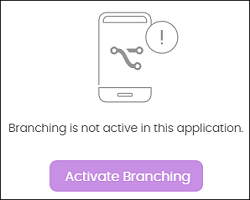
If branching is not active, the Activate Branching button appears (see below). To learn more about how to activate branching, read Collaborative Building.
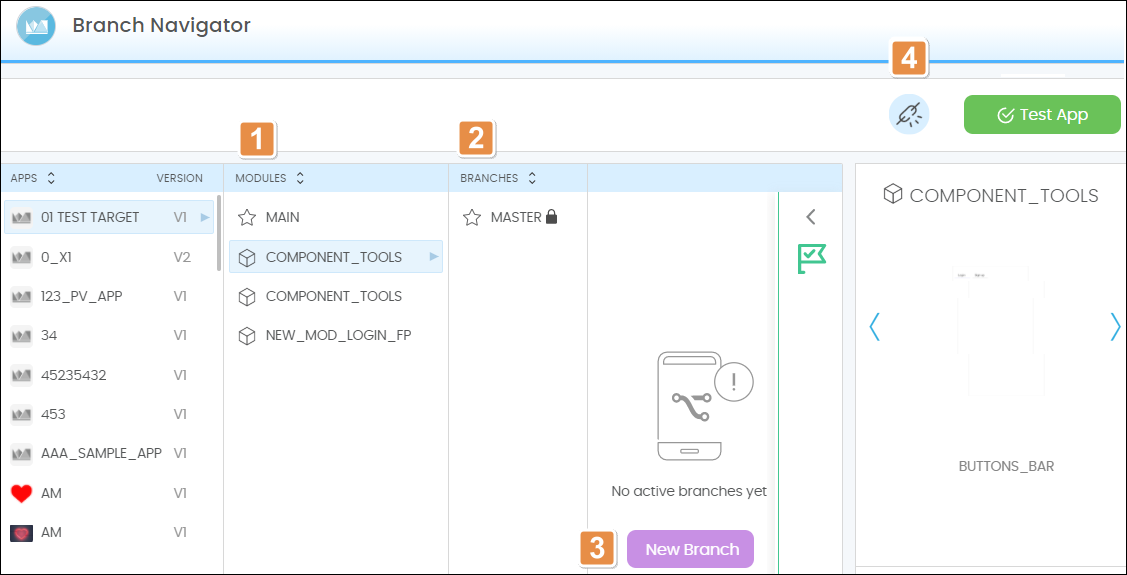
Modules. List of modules. Any linked modules appear below the main module.
Branches. List of branches already created for the selected module. The Master branch will be automatically created as a read-only branch.
New Branch. Click to create a new branch for the selected module.
Unlink module. Click to unlink the selected module from the application.
If branching is not active, the Activate Branching button appears (see below). To learn more about how to activate branching, read Collaborative Building.

The Branches column shows a list of all the branches created for the module you selected in the previous step. The Master branch is created automatically and is read-only. You can create different types of branches from the Master branch: feature branches and hotfix branches.
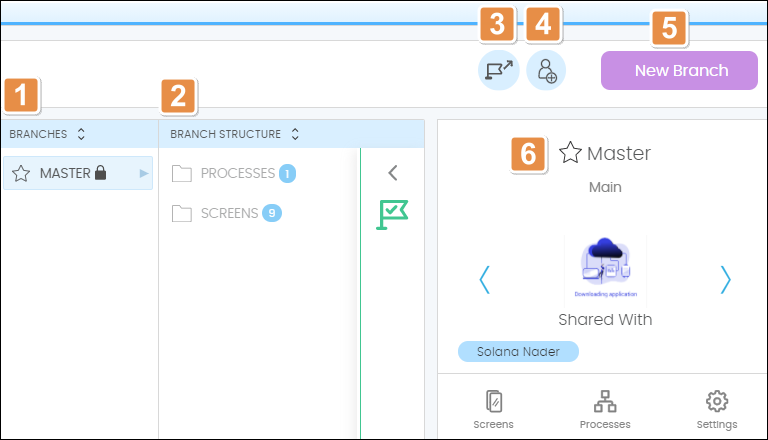
Branches. Branches available for your app. The Master branch will automatically show. You can create feature or hotfix branches from this branch.
Branch Structure. List of processes and Screens within the selected Branch. Click each folder to see the options available.
Export Master Version. Click to obtain a ZIP file containing the Master branch. Once the window opens, select a version from the drop-down menu and click Export. The file will be automatically downloaded to your computer and ready to be shared with your client.
Share With. Click to share the selected branch with other users. Read Roles and Permissions to learn more.
New Branch. Click to create a new branch.
Preview pane. Shows basic information and a preview of the screens of the selected app.
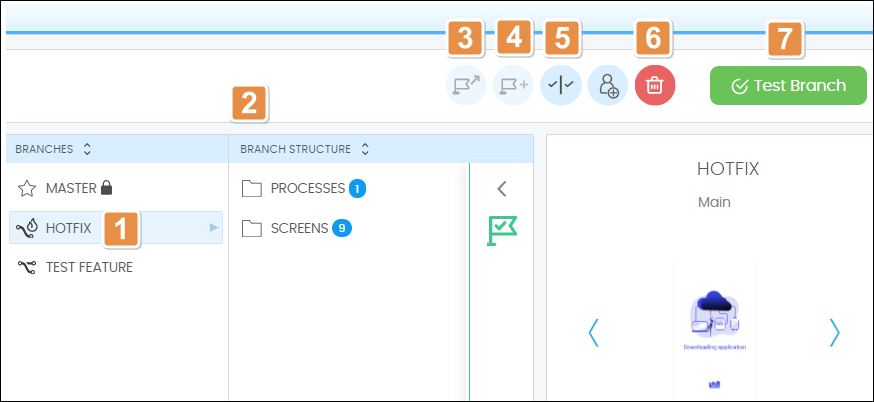
Hotfix. Hotfix branch available for your app.
Branch Structure. Processes and screens available for your hotfix branch.
Export Hotfix Version. Click to export the latest hotfix version. This action will only be available if you previously create a new hotfix version.
Create Hotfix Version. Click to create a new hotfix version. This action will only be available if the hotfix branch is different from the Master branch.
Compare. Click to compare the selected hotfix branch with the Master branch and update or commit changes.
Delete. Click to delete the selected branch.
Test Branch. Click to test the selected branch.
Feature Branch
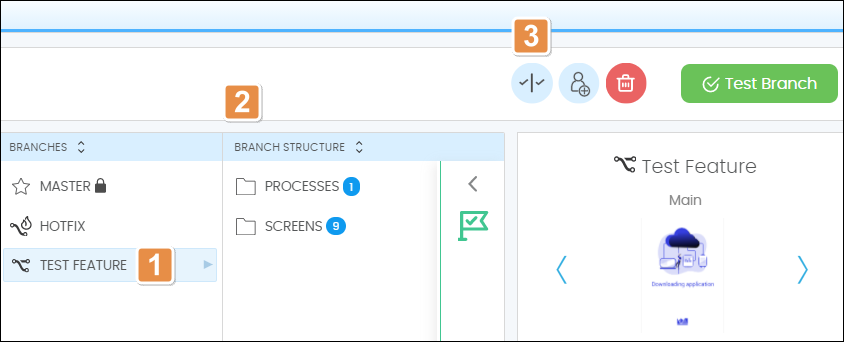
Feature. Feature branch available for your app.
Branch Structure. Processes and screens available for the Feature branch selected.
Compare. Click to compare the feature branch with the Master branch and update or commit changes.
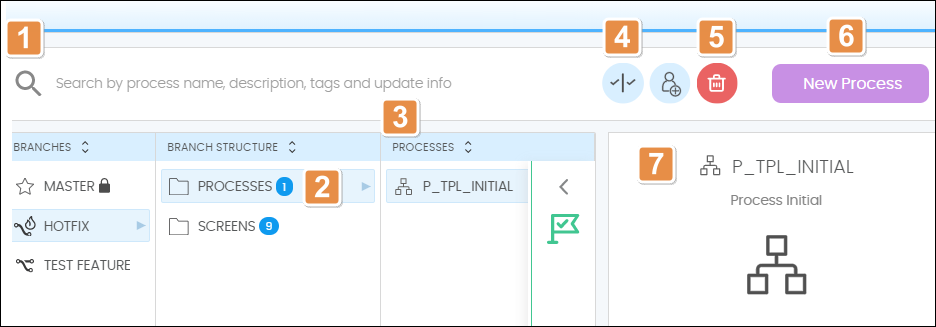
Search bar. Search processes by name, description, tags or update info.
Branch Structure. Click the processes folder to open it and see the list of processes available in the branch selected.
Processes. Click any process to see its details in the Preview pane and double click to access its basic information and steps.
Compare. Click to see the changes in screens and processes between the selected branch and the Master branch.
Delete. Click to delete the selected process. This action is available only if you select a specific process.
New Process. Click to create a new process.
Preview. Shows basic information about the selected process.
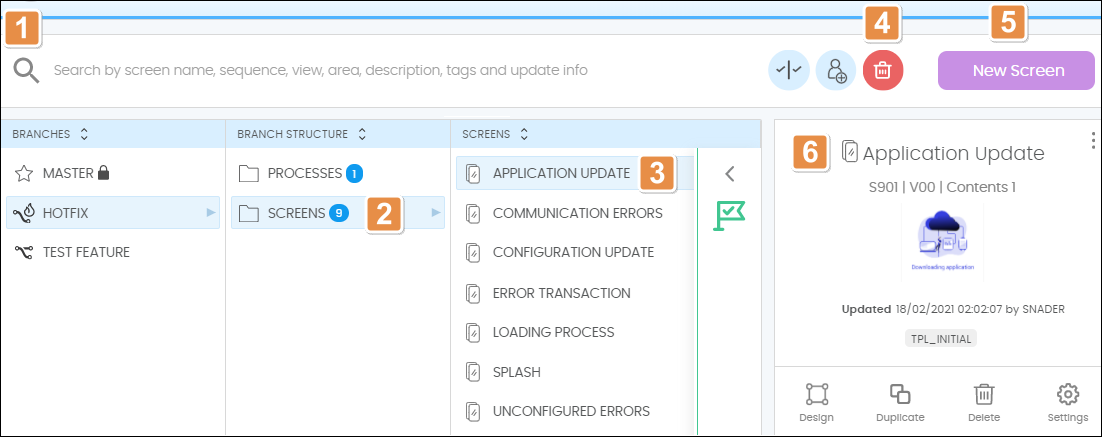
Search bar. Search screens by name, description, tags or update info.
Branch Structure. Click to open the Screens folder and see the list of screens available in the branch selected.
Screens. List of screens available for the selected branch. Click any process to see its details in the Preview pane. Double click to access the Visual Builder and build the selected screen.
Delete. Click to delete the selected screen. This action is available only if you select a specific screen.
New Screen. Click to create a new screen.
Preview pane. Shows basic information about the selected screen and gives you access to different actions available for screens. To learn more, go to Screens.